

Rough Turning a Big Cherry Bowl
I recently was able to assist a wood turning club member in milling some very nice, and very big cherry logs. Below is the process I use getting a log into a bowl blank, and rough turning it into a workable form.
The process-
- Get a good friend who has a big cherry log, and has a saw mill (I have really good friends!!)
- Cut slabs out of the logs
- Plan the bowl blanks on your slabs
- Rough cut the blanks out of the slabs
- Cut bowl rounds from the rough cut blanks
- Prepare the bowl blank for the lathe
- Mount the blank on the lathe
- Rough turn the bowl blank
- Soak the bowl blank in denatured alcohol
- Dry the bowl blank
- Turn the final bowl shape
- Sand and Finish the bowl
Step 2- (Step 1 is up to you)
We loaded the large cherry log onto the saw mill and cut it into two very large blanks.
The two blanks on the saw mill:
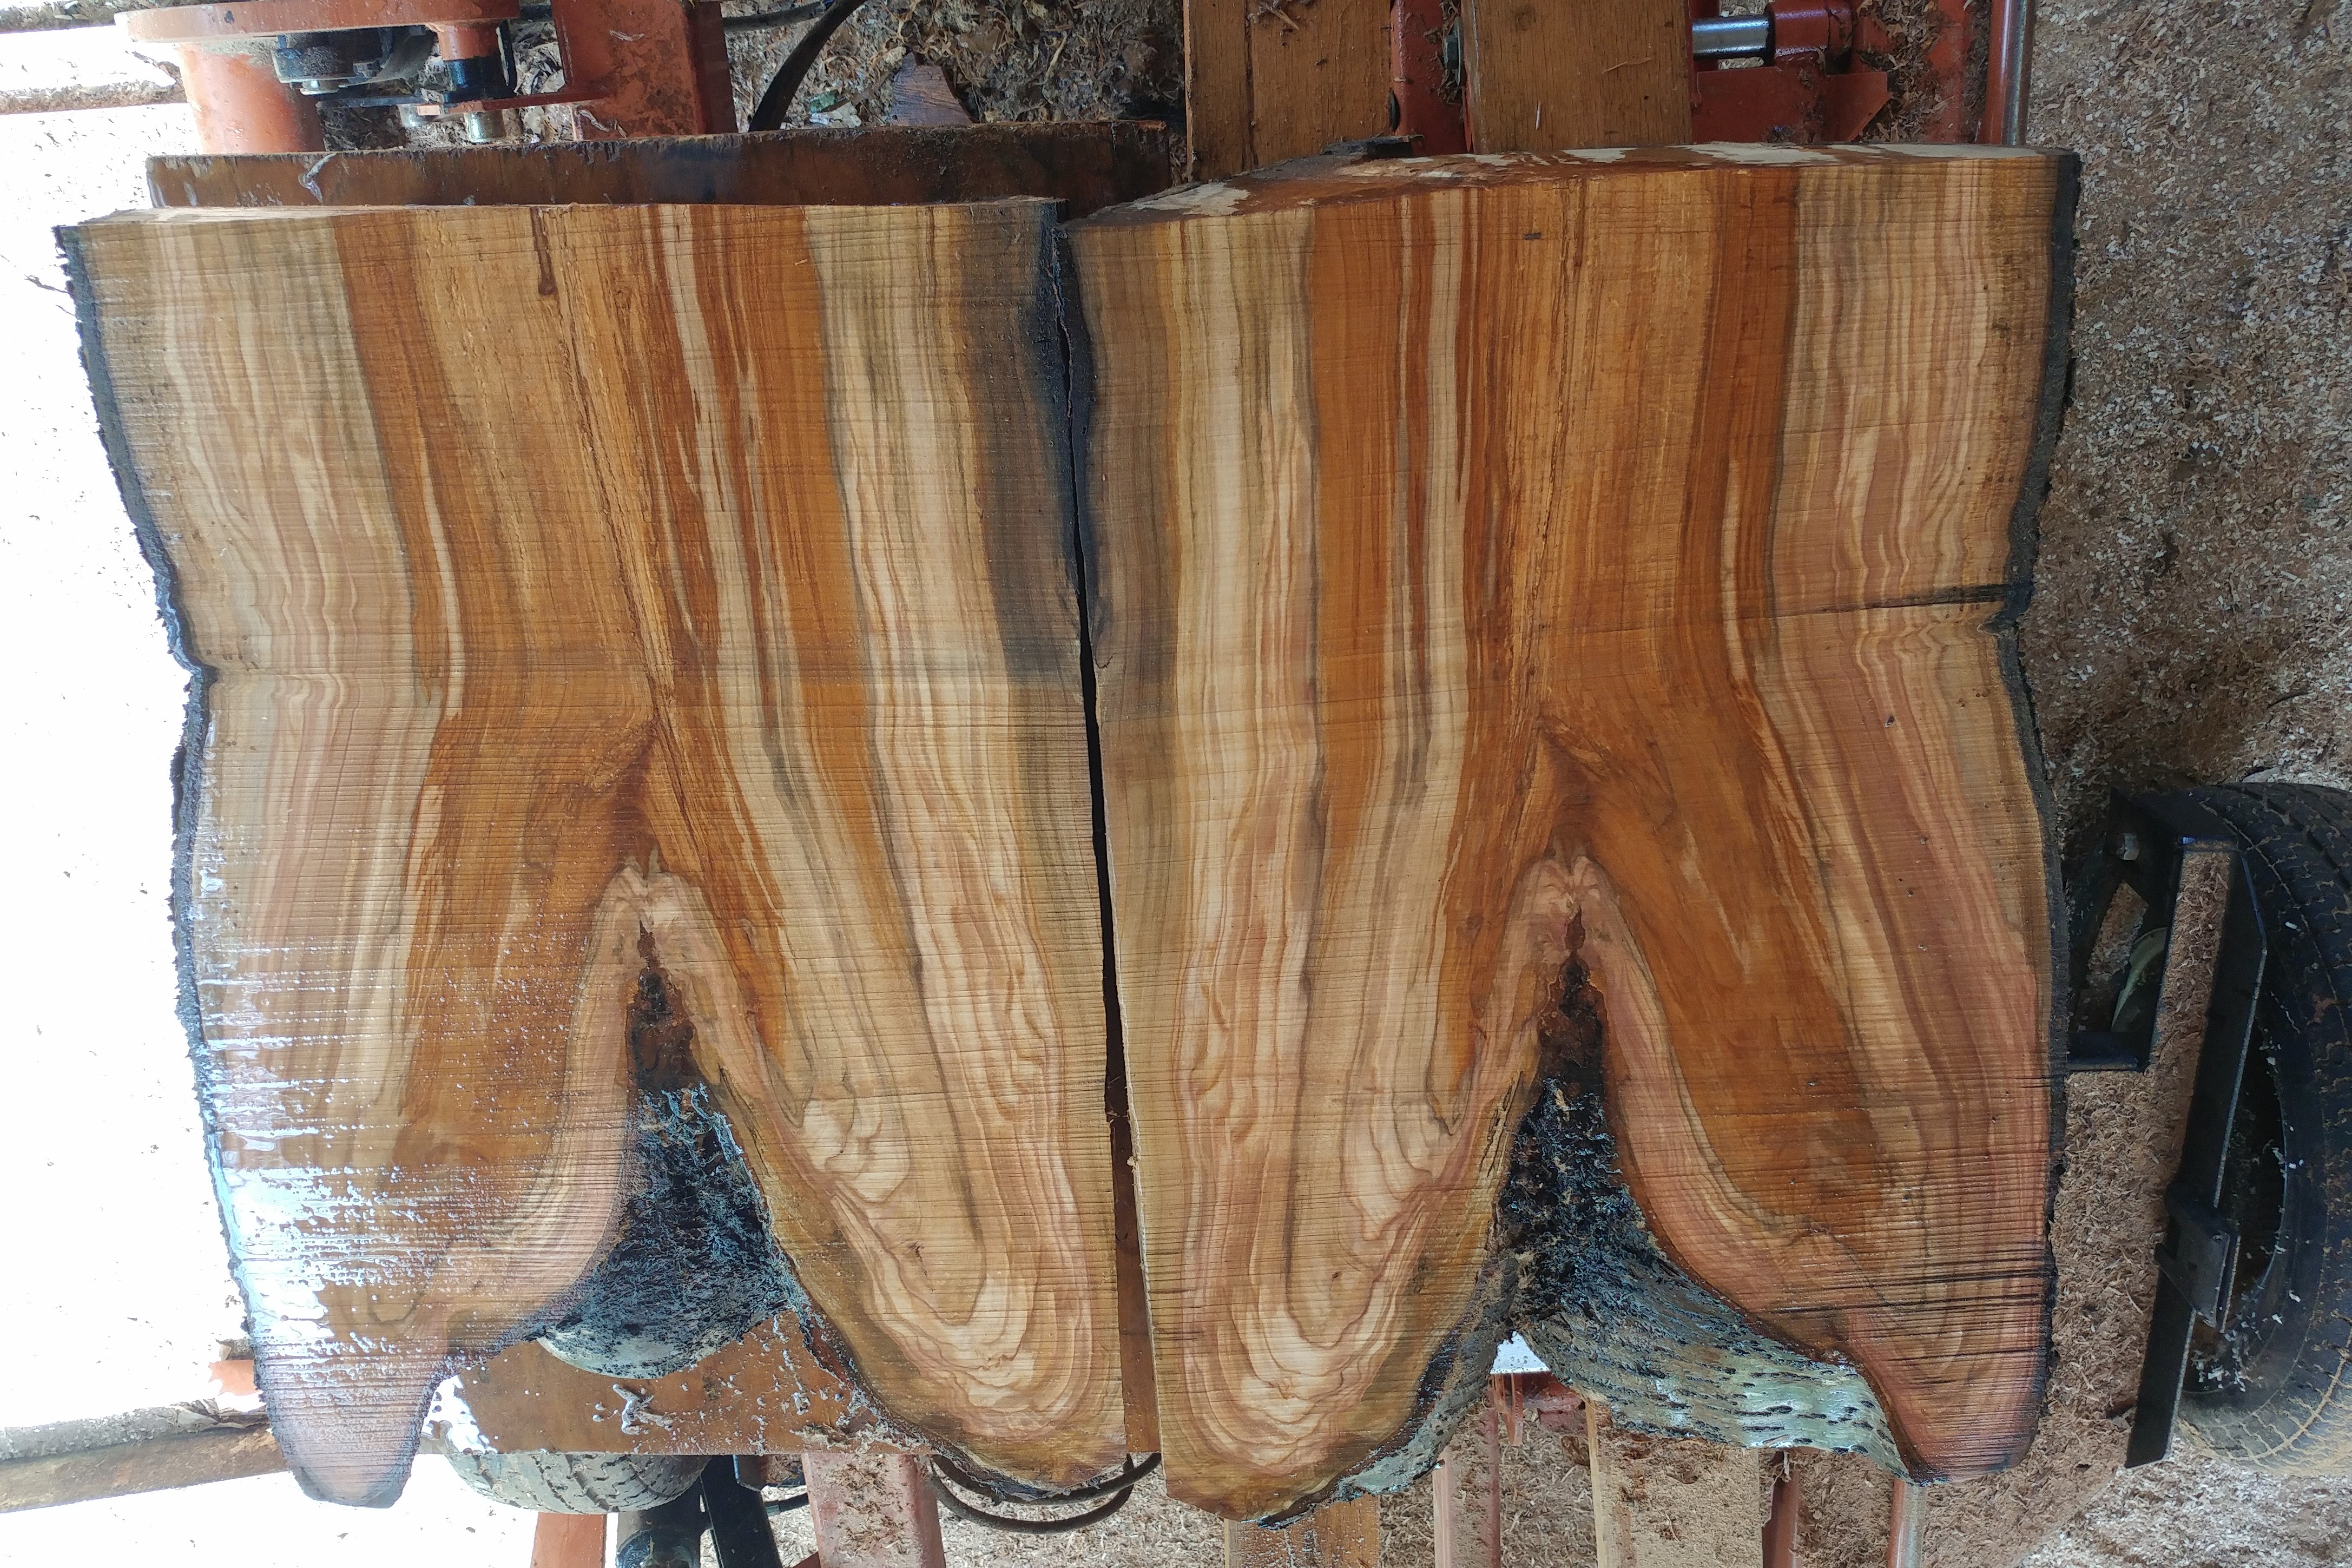
Cherry slabs on saw mill
These slabs weighed well over 350 pounds each, and were roughly 34 inches long and almost 21 inches wide. One was 8 inches thick, and the other was 7 and a half inches thick.
Step 3-
Laying out the blank on the slabs. I try to maximize the size of the blank, and try to include as much of the interesting part of the blank as possible. These slabs are from multiple branches coming into the trunk at the same spot. The images do not show the 3 other branches which connected to the trunk as well. You can see two of the 5 branches which originally were part of the log.
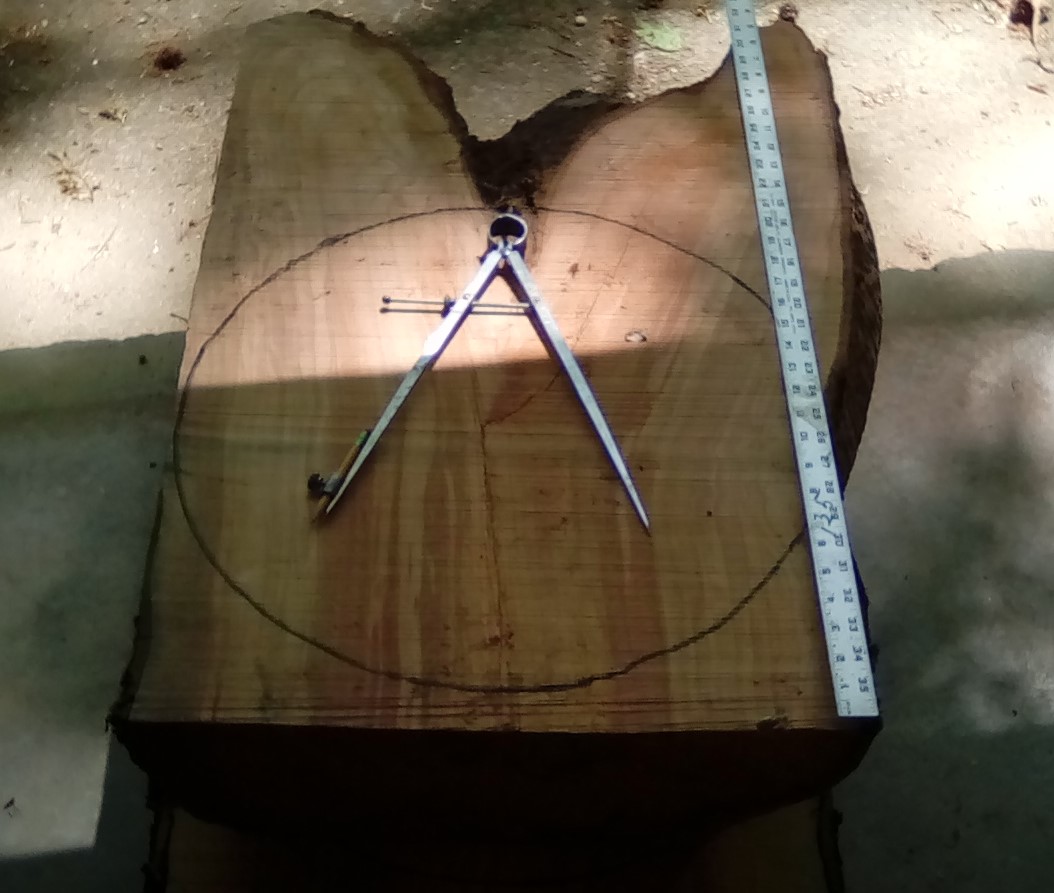
Laying out the blank on the slabs with a compass
Step 4-
The original log the slabs were cut from have been laying on the ground for several years. The moisture content in the slabs was still pretty high, considering the time it had been laying on the ground. It made the slabs very heavy and dangerous to move and place on the bandsaw to cut into round blanks. It was time to fire up the chainsaw and do a little trimming. This reduced the weight and also gave me a rough shape to work with on the bandsaw.
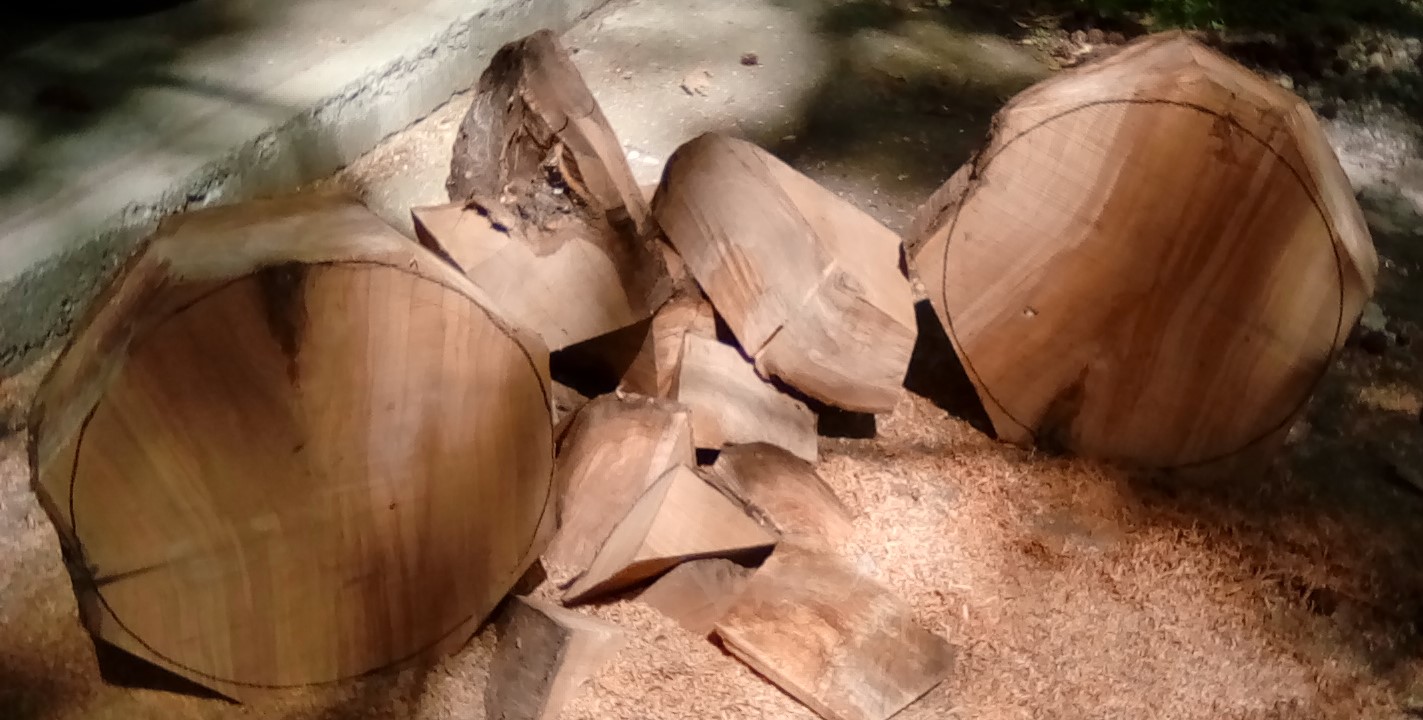
Two blanks from the slabs

Cart with the rough cut cherry blanks
Step 5-
I am fortunate enough to have access to a 20 inch bandsaw and easily cut the blanks into a round form. By rounding the blanks, it makes the balance on the lathe much smoother, and is much easier to turn. This step required quite a bit of strength and attention to safety.
I will upload an image of the rounded blank shortly. I got excited with getting the blank turned and missed taking an image of this step!
Step 6 and 7-
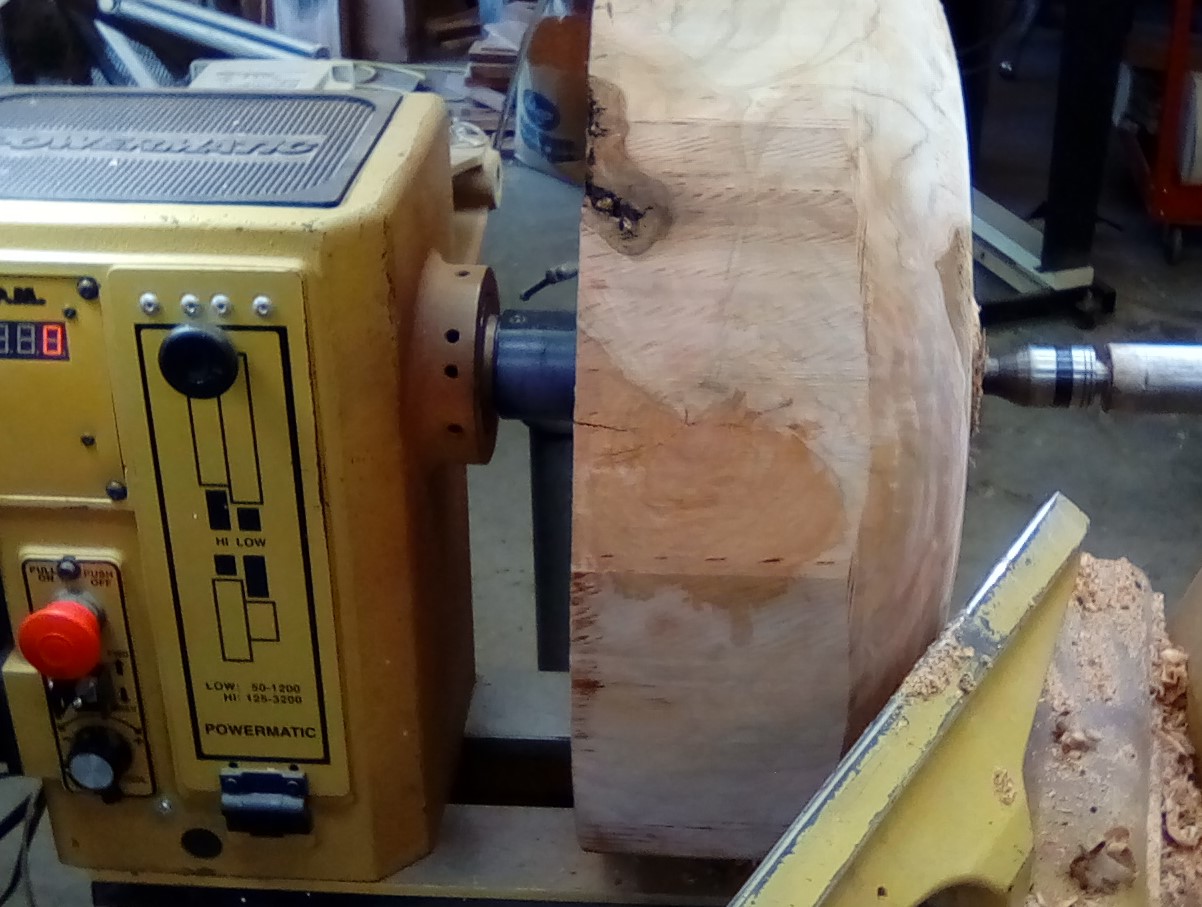
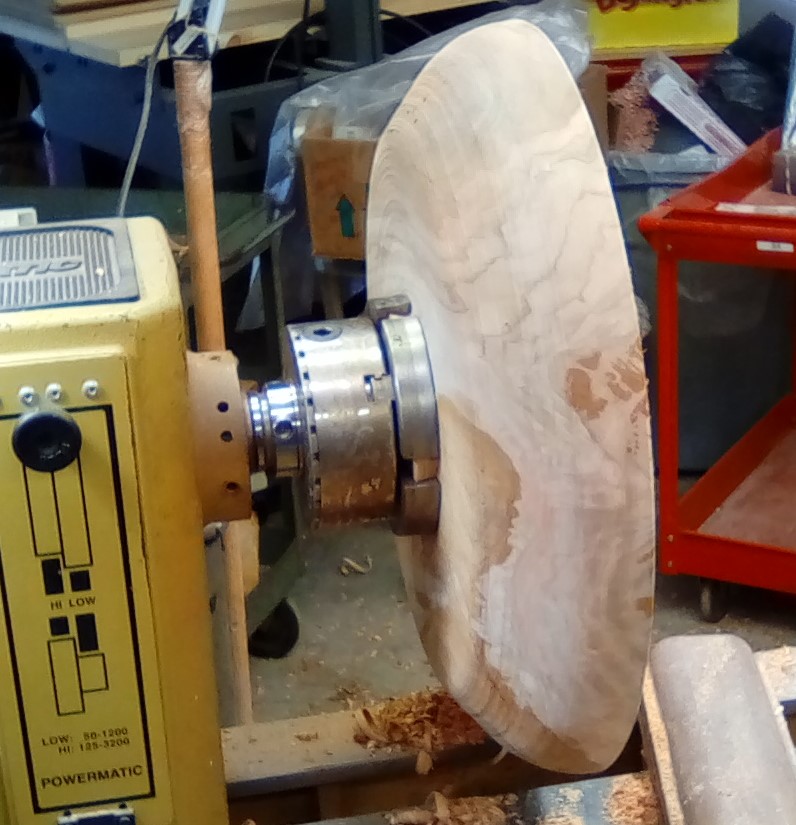
Getting a blank ready for the lathe can be accomplished in many ways. There are several great ways to mount a bowl blank and turn it, but a blank this size requires some extra precautions. This can be extremely dangerous (unless my mother is reading this blog post, and then it is perfectly safe!), and attention to every step in the mounting process must be carefully planned and then rechecked to make sure it has been done correctly. The blank is very heavy, and very large, so I went with a steel face plate with 3 inch steel screws for the head stock side, and a toothed point drive on the tail stock side. The rough blank was only a half inch smaller than the lathe was capable of turning in a normal configuration.
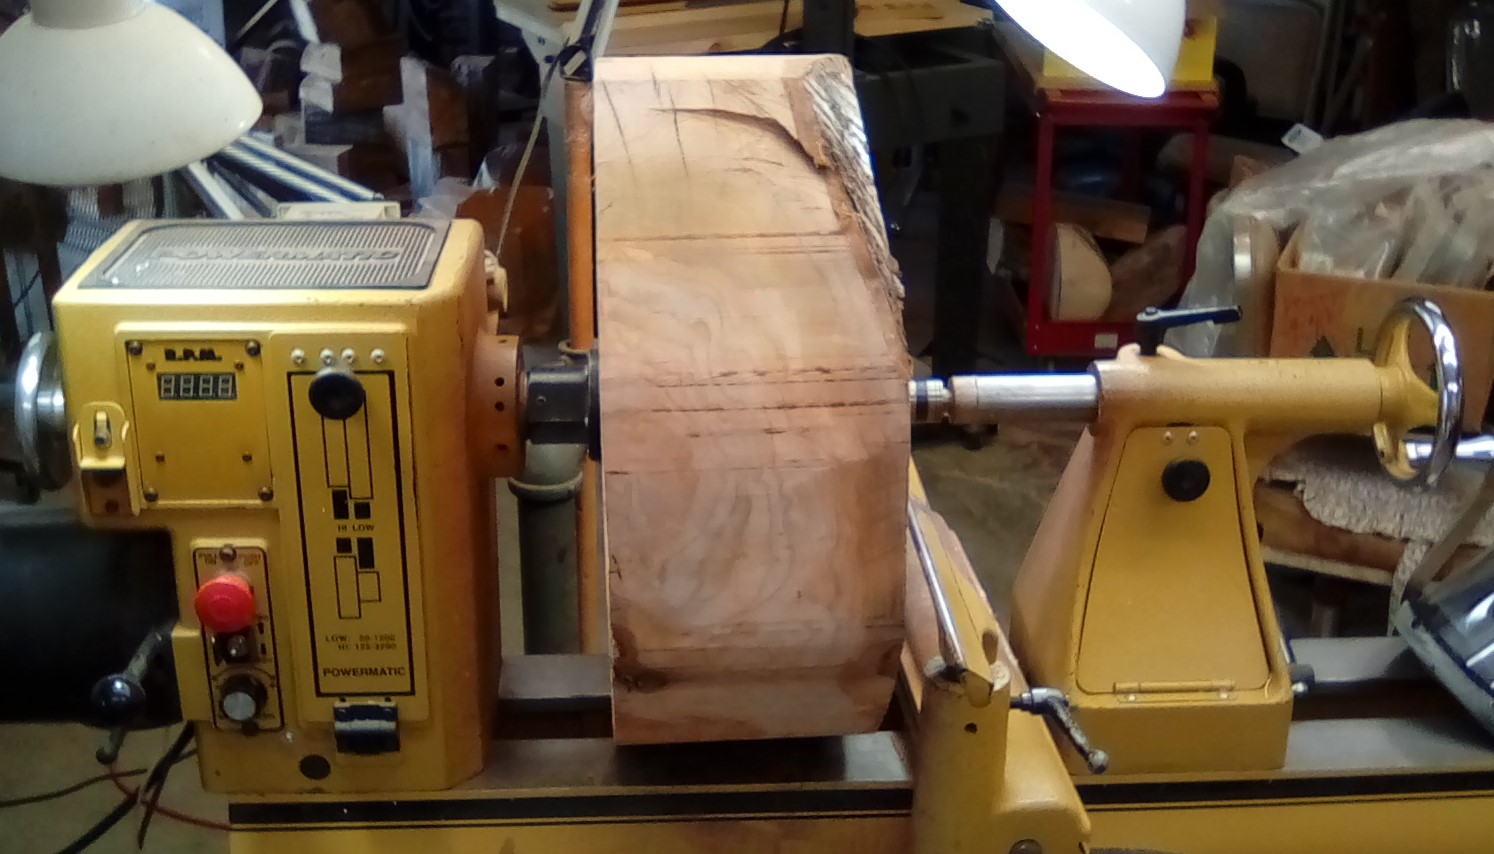
Initial mounting of the cherry bowl blank on the lathe
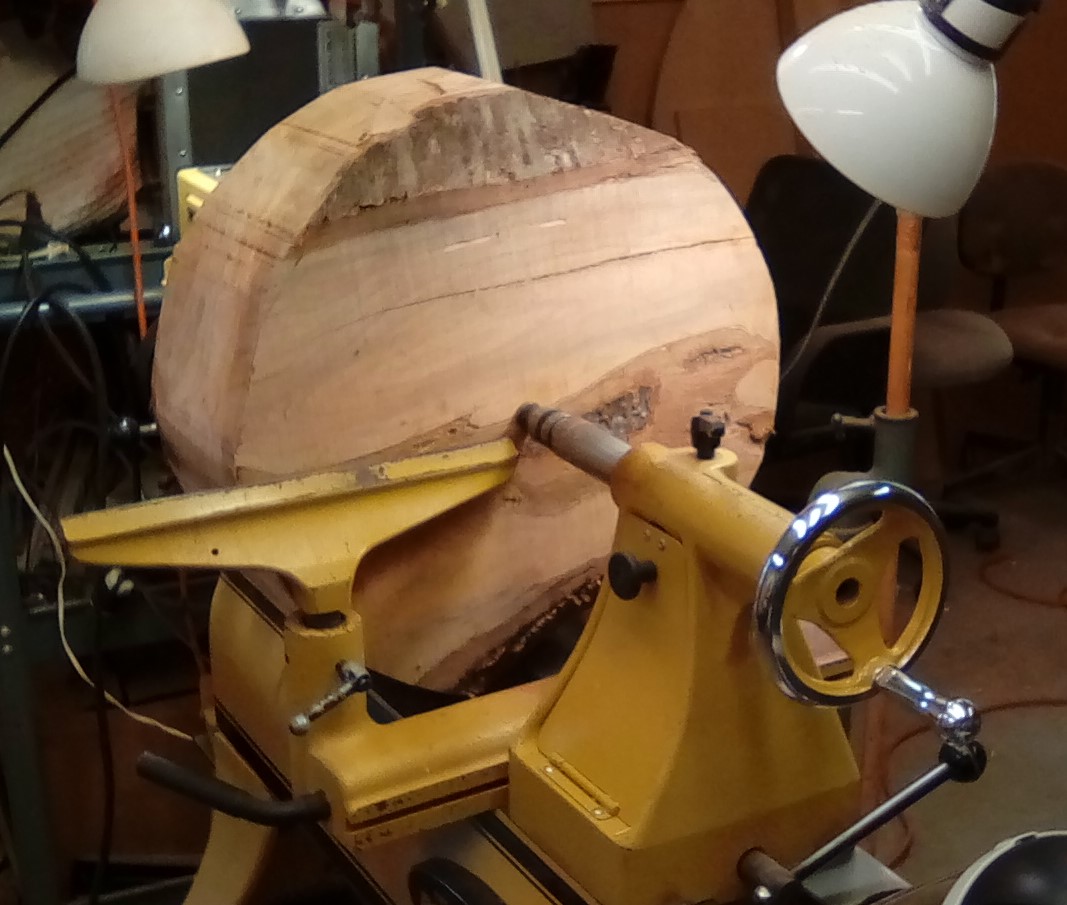
View from the tail stock side of the lathe for the initial mounting
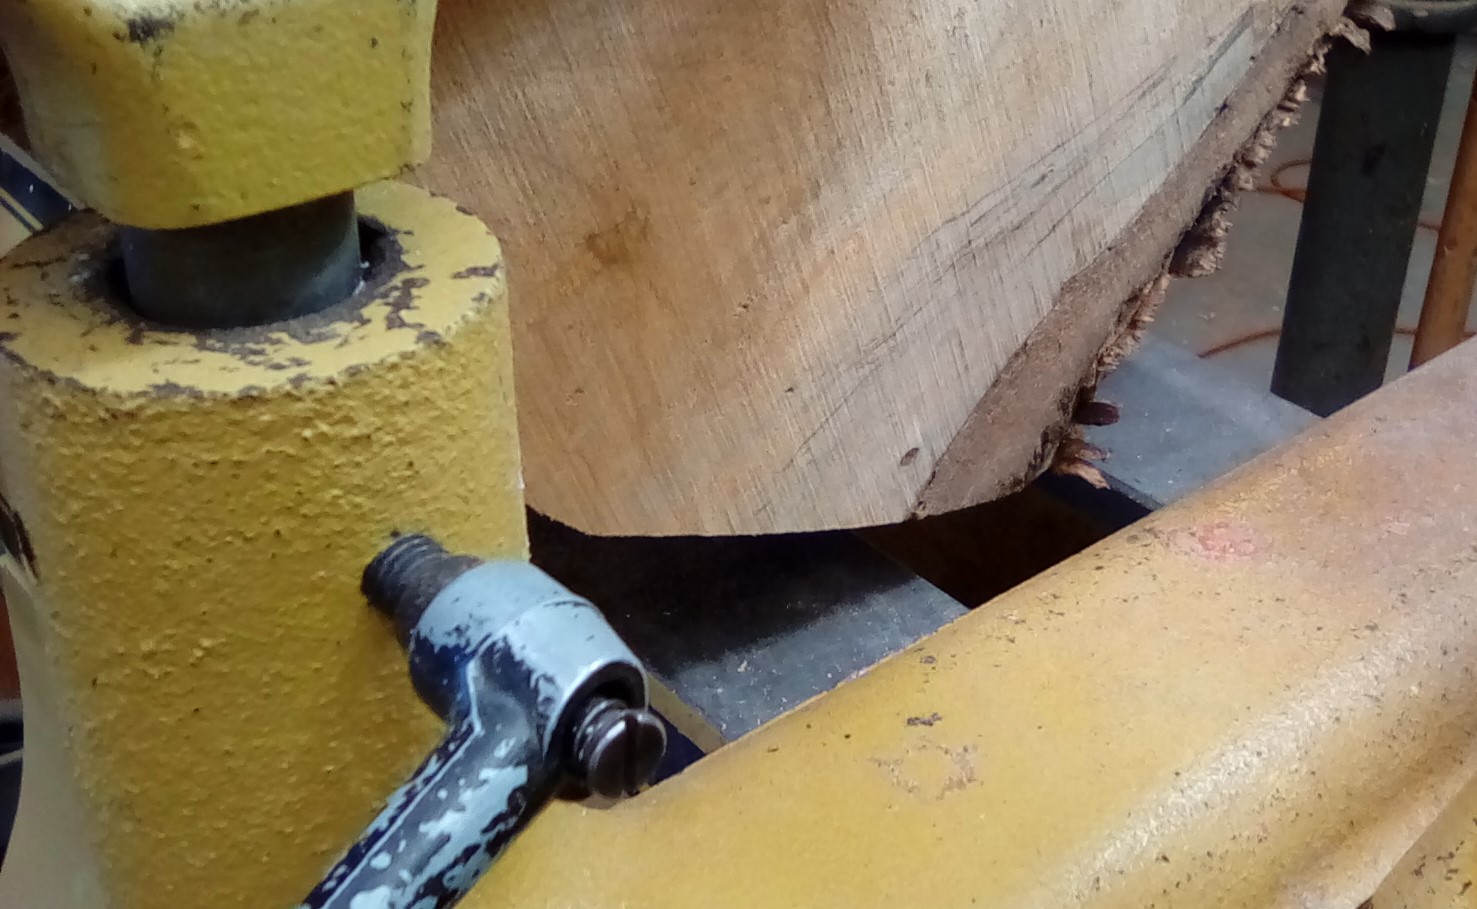
A meager half inch of space was left for clearance
Step 8-
Turning something this large is extremely dangerous (again if my mother is reading this, it was perfectly safe!), and must be constantly kept under watch for any issues that may arise from being unbalanced, or any indication from the methods of holding the piece of work that they are not working properly. Speed is also something that is a factor that must be watched constantly. Needless to say, slow and safe is the process that works the best. I sharpened my bowl gouge and donned a pretty serious set of safety gear, including safety glasses, and a full helmet and respirator. I wanted to make sure everything was safe and secure. I double and triple checked the speed and all of my methods of holding the blank on the lathe. The initial speed for my roughing phase was 125 rpm. Yes, that is extremely slow, but until I got the blank more balanced, I did not want any issues arising from turning too fast.
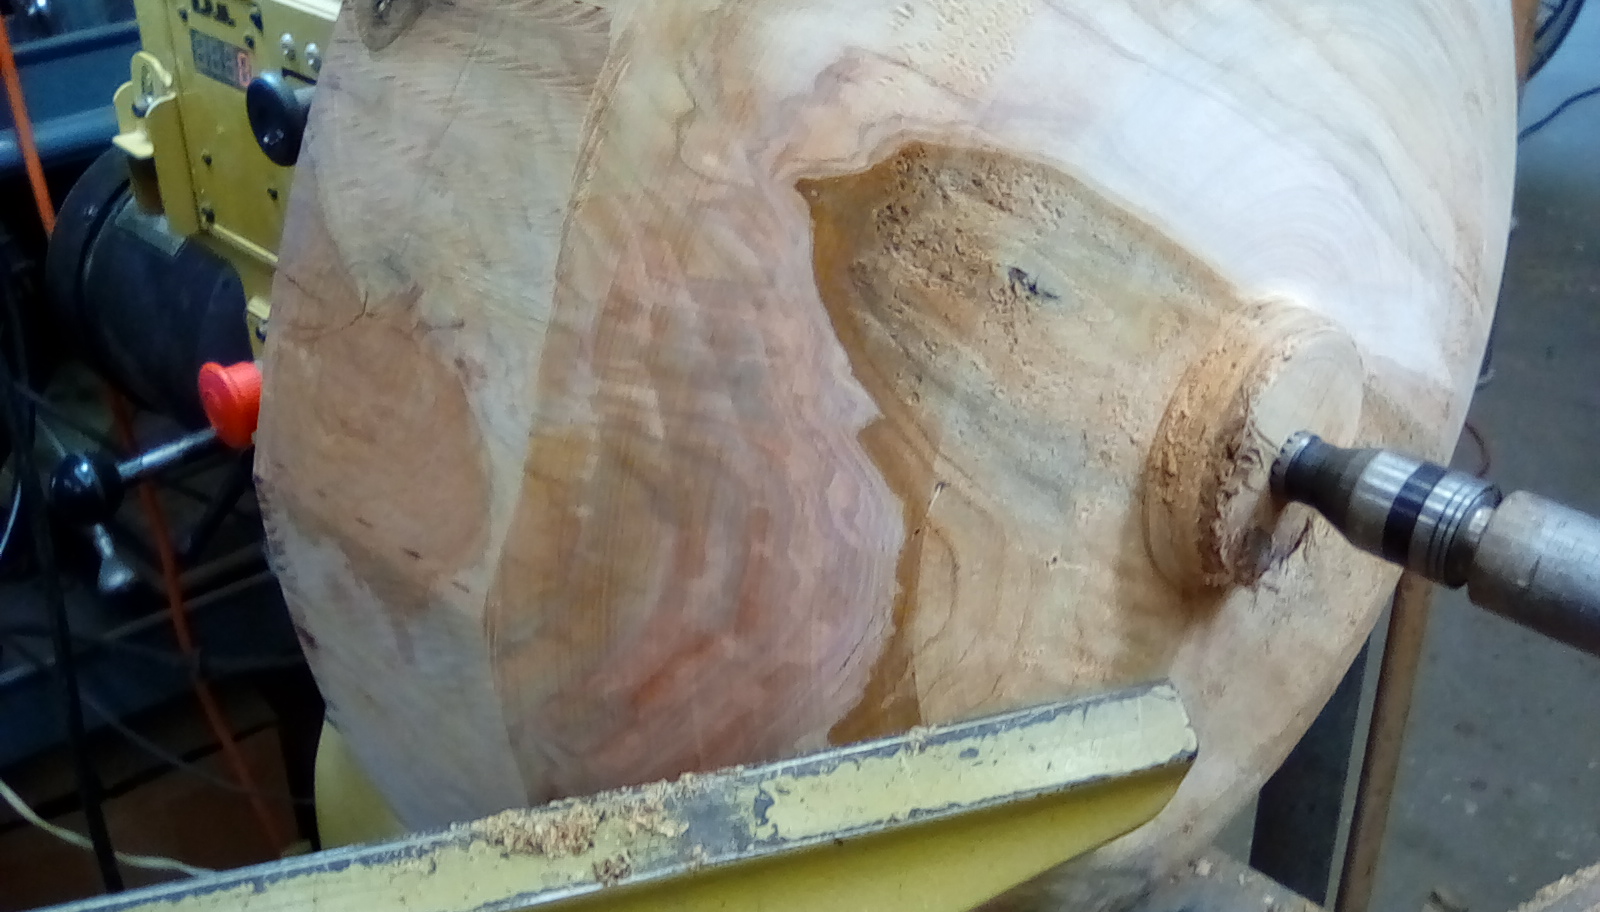
The blank had some seriously punky parts which needed to be turned off. Once the blank got on the lathe, and I started turning it, I discovered many issues that forced me to make the bowl much shallower than originally intended. I started off with a 7 inch thickness, but only realized a 3 and a half inch thickness when I was done. There were many piths in the blank, checks and cracks, and many punky spots which required some design changes. I was happy to keep the overall size to 18 and a quarter inches in diameter when completed.
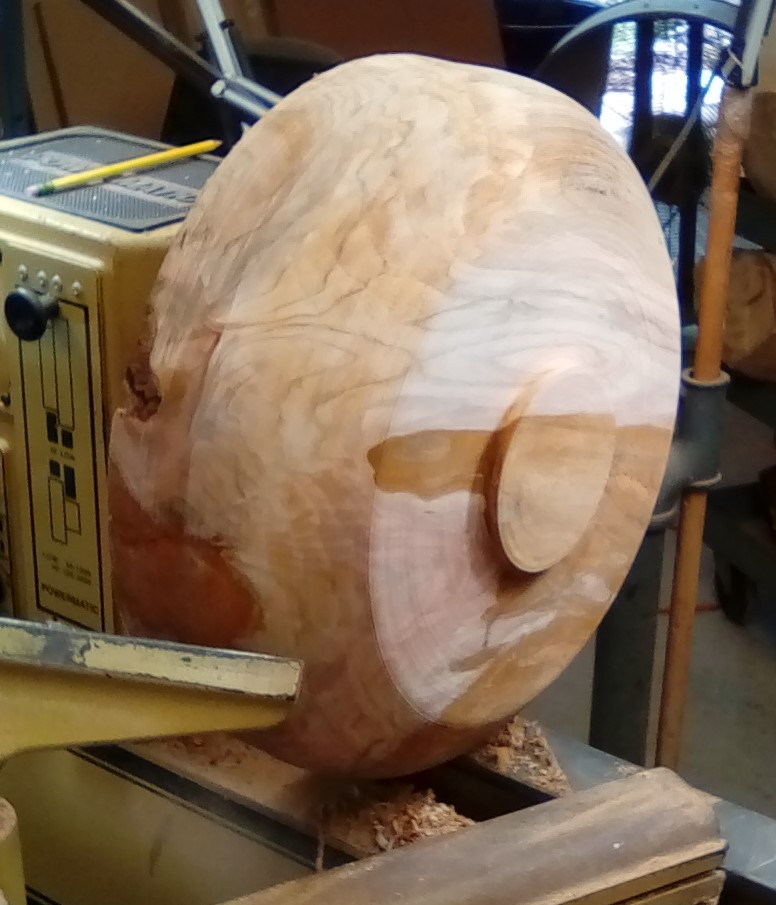
There are two parts to rough turning the bowl blank. The outside of the blank, is done first, which includes the tenoning process. Secondly the inside of the bowl is completed by reverse mounting using a scroll chuck and the newly turned tenon. We leave the thickness about an inch or so, just in case the wood moves during the drying process.
Cherry bowl blank outside profile being defined
beginning to shape the outside profile of the bowl
Side view of the beginnings of the outside profile
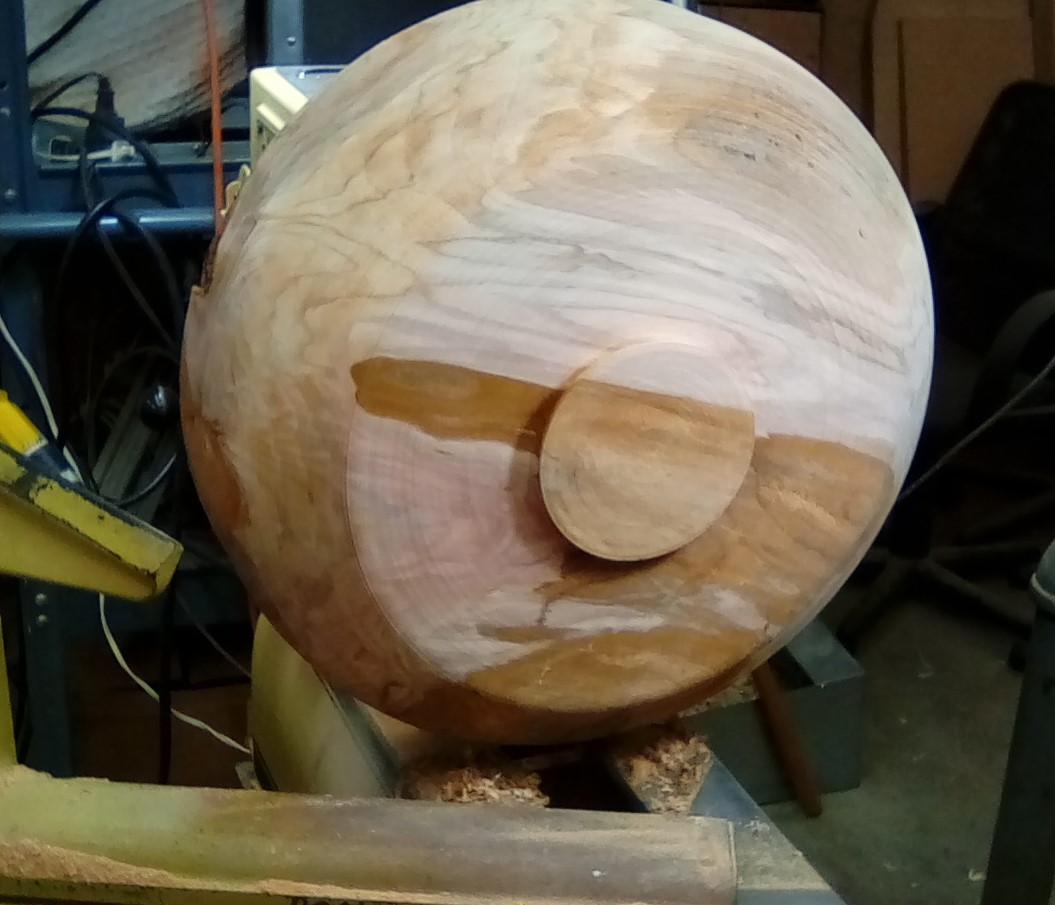
Adding the tenon to the blank for reverse chucking
side view of the tenon
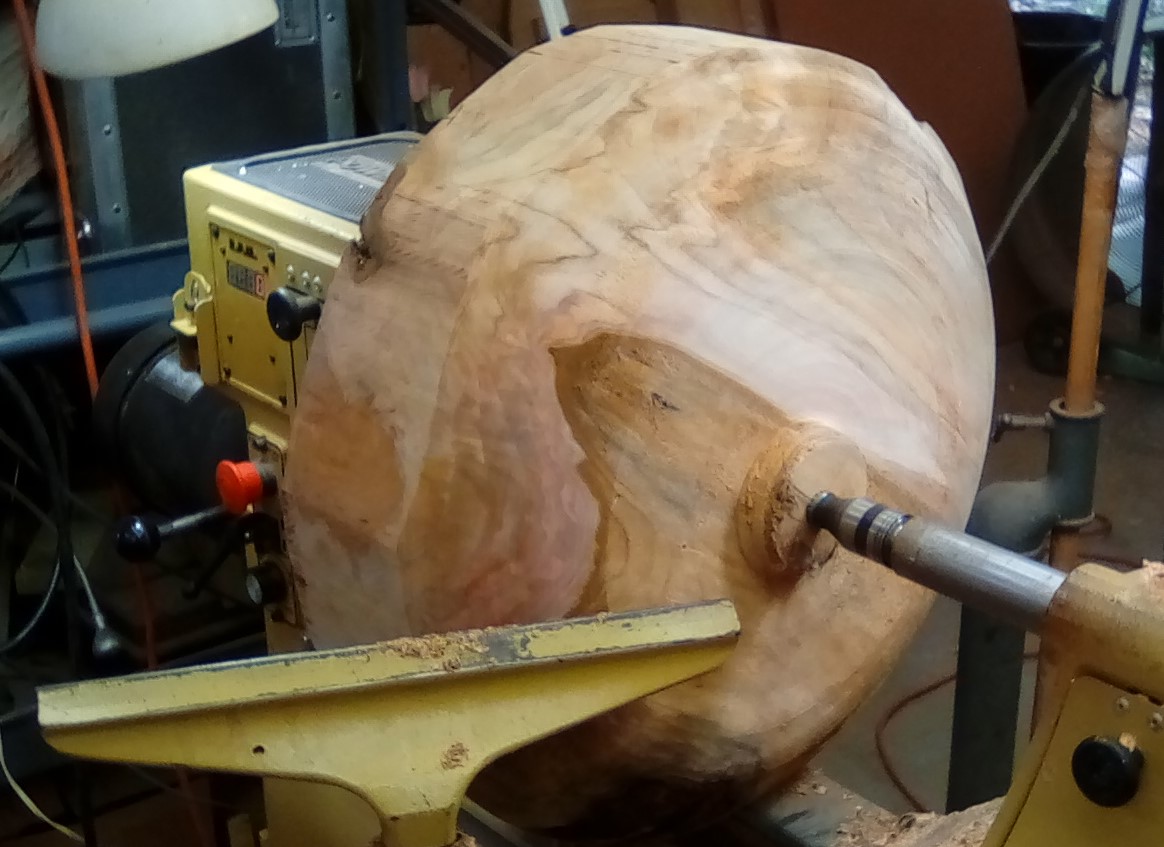
The outside of the bowl is complete and now mounted to start the inside
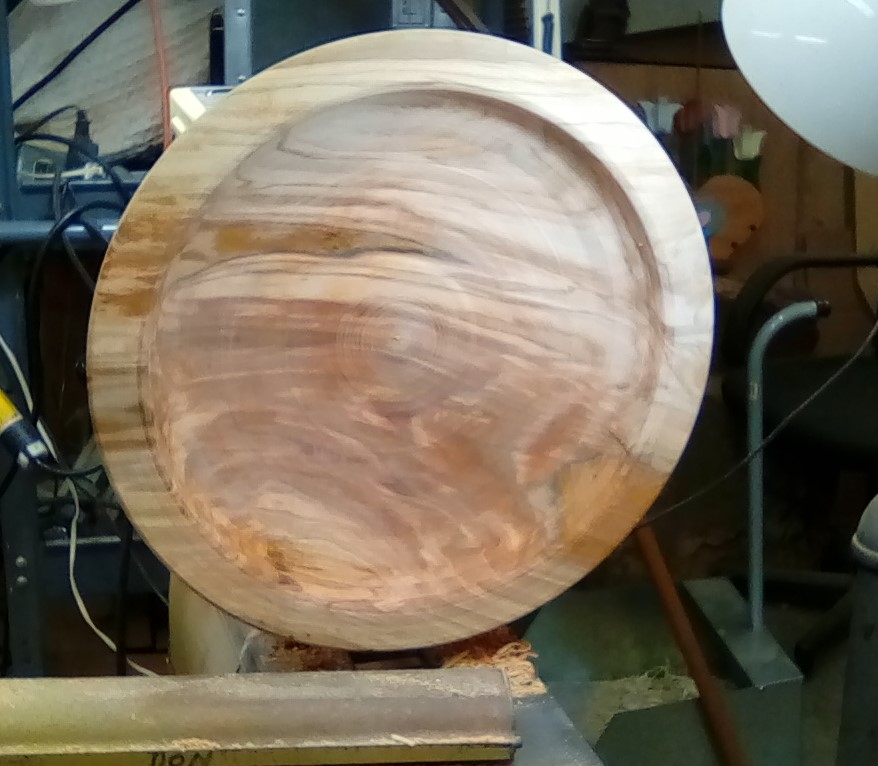
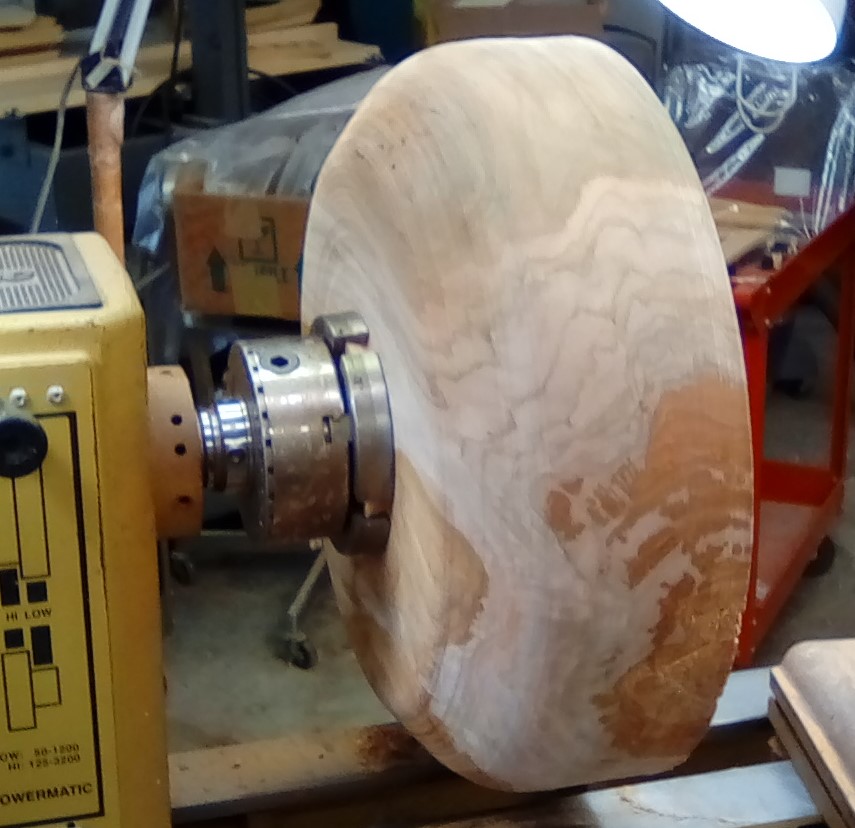
Inside of the blank completed
Side view of the completed blank
Step 9 to 12-
The blank is removed from the lathe and is now placed in a container of denatured alcohol. By soaking the blank overnight, the alcohol will displace the remaining water in the blank, and allow the bowl blank to dry quicker. Once the blank has been soaked overnight, it will be removed from the alcohol and then placed out to dry. It usually takes about 5 to 6 weeks for the alcohol to dry out of the blank, so in about 6 weeks, we will be able to remount the blank on the lather and finish turning the bowl blank.
I will post a new blog when the blank is out of the alcohol and I am able to complete the final turning.
