

Windsor Chair Project- Completing the paint
The Windsor chair project has progressed now to the point where I am painting the chair. I decided I wanted a traditional finish, but also for the chair to show considerable wear. I want a chair that looks like a wise and faithful companion in the corner of the room, which is 150 years old. I prepped the chair by finish sanding down to 320 grit and giving it a good dose of compressed air to blow the dust off. I viewed an “antiqued” box, which is on display at the Woodcraft store in Roswell, Georgia and used the same finish material which was used to make the box look much older than it actually is. The first coat will be a General Finishes Milk Paint product, the color is Holiday Red. Let me tell you, this is definitely an apt title for the paint color. Opening the can, reminded me instantly of Santa’s suit, Rudolf’s nose, and a red sleigh! The second and third coat will also be a General Finishes Milk Paint product and the color will be Lamp Black. Again, this is a great title for the color, it is very dark black. Once the paint is applied to the chair I will use a wax to seal up the milk paint. Before I apply the wax, I will sand through the black paint, and get some of the red to show through in typical wear patterns that you would see on an old Windsor chair. I am even planning on sanding all the way through the red, and getting some of the wood to show through.
The Windsor chair is now finish sanded, and awaits a few coats of paint and wax-
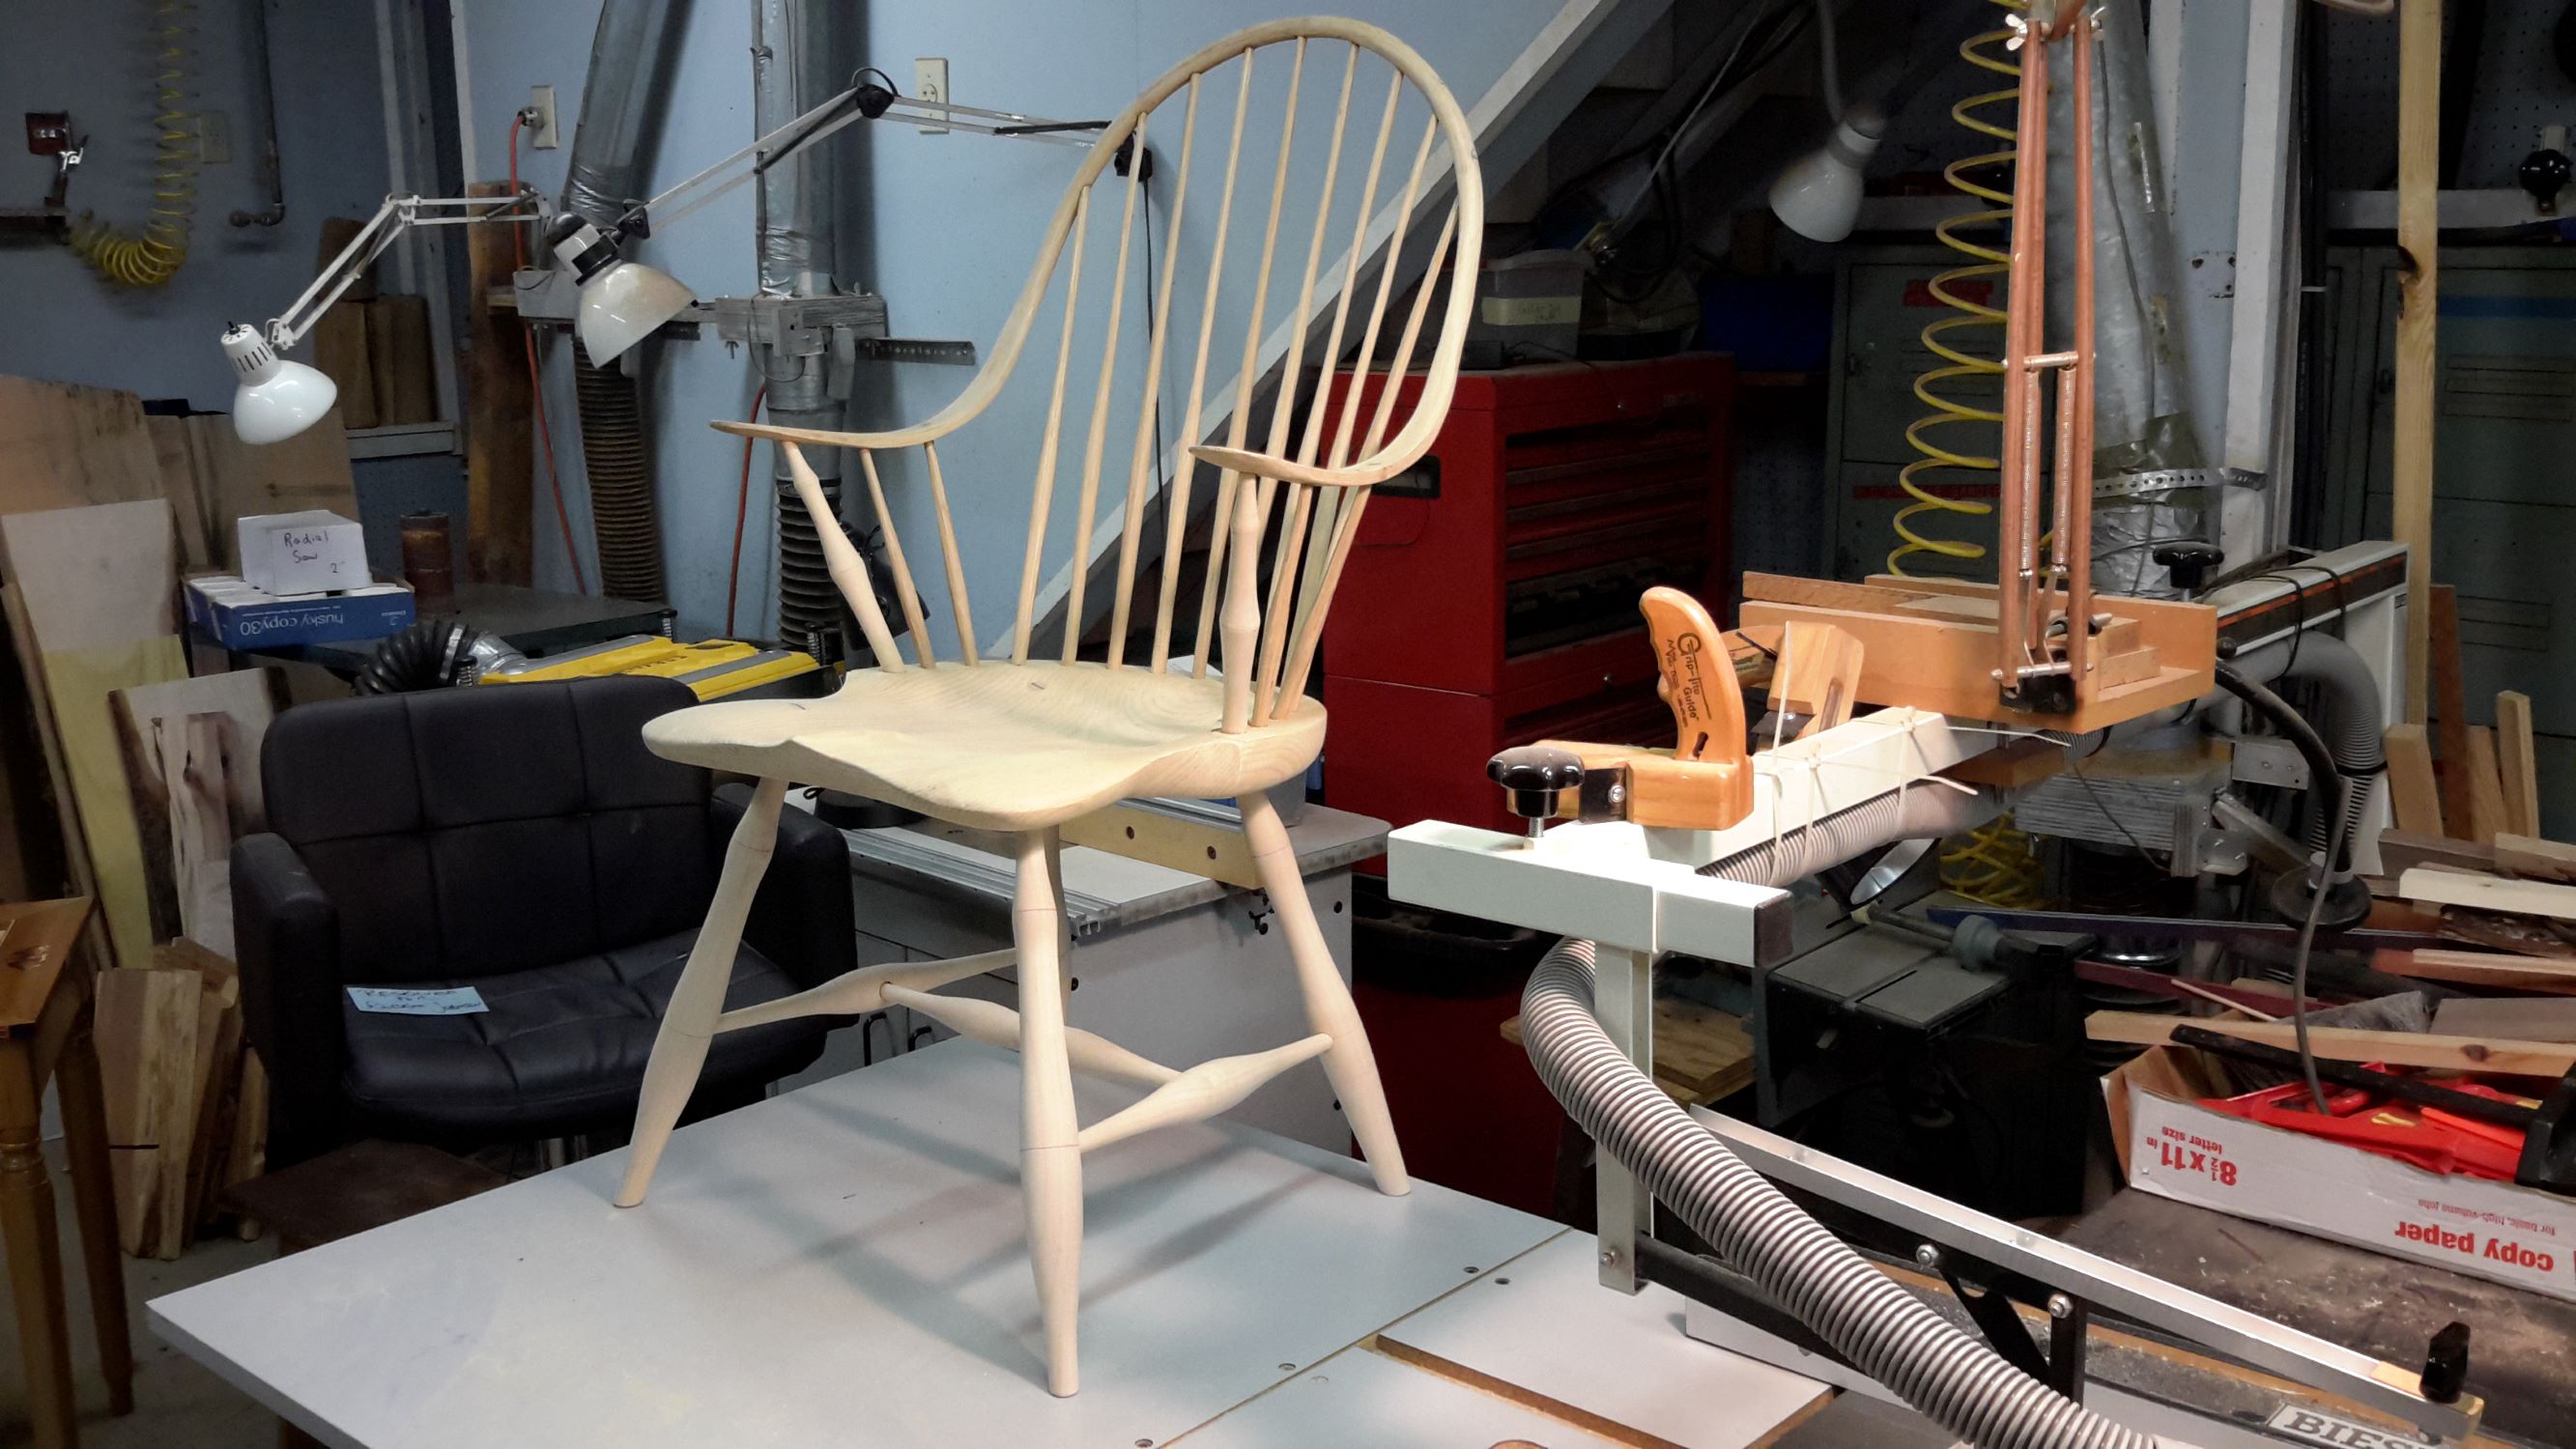
Windsor chair final sanded
The first coat of General Finishes Milk Paint (the red kind of shows up as a pink in the pictures, but I assure you it is bright red!)-
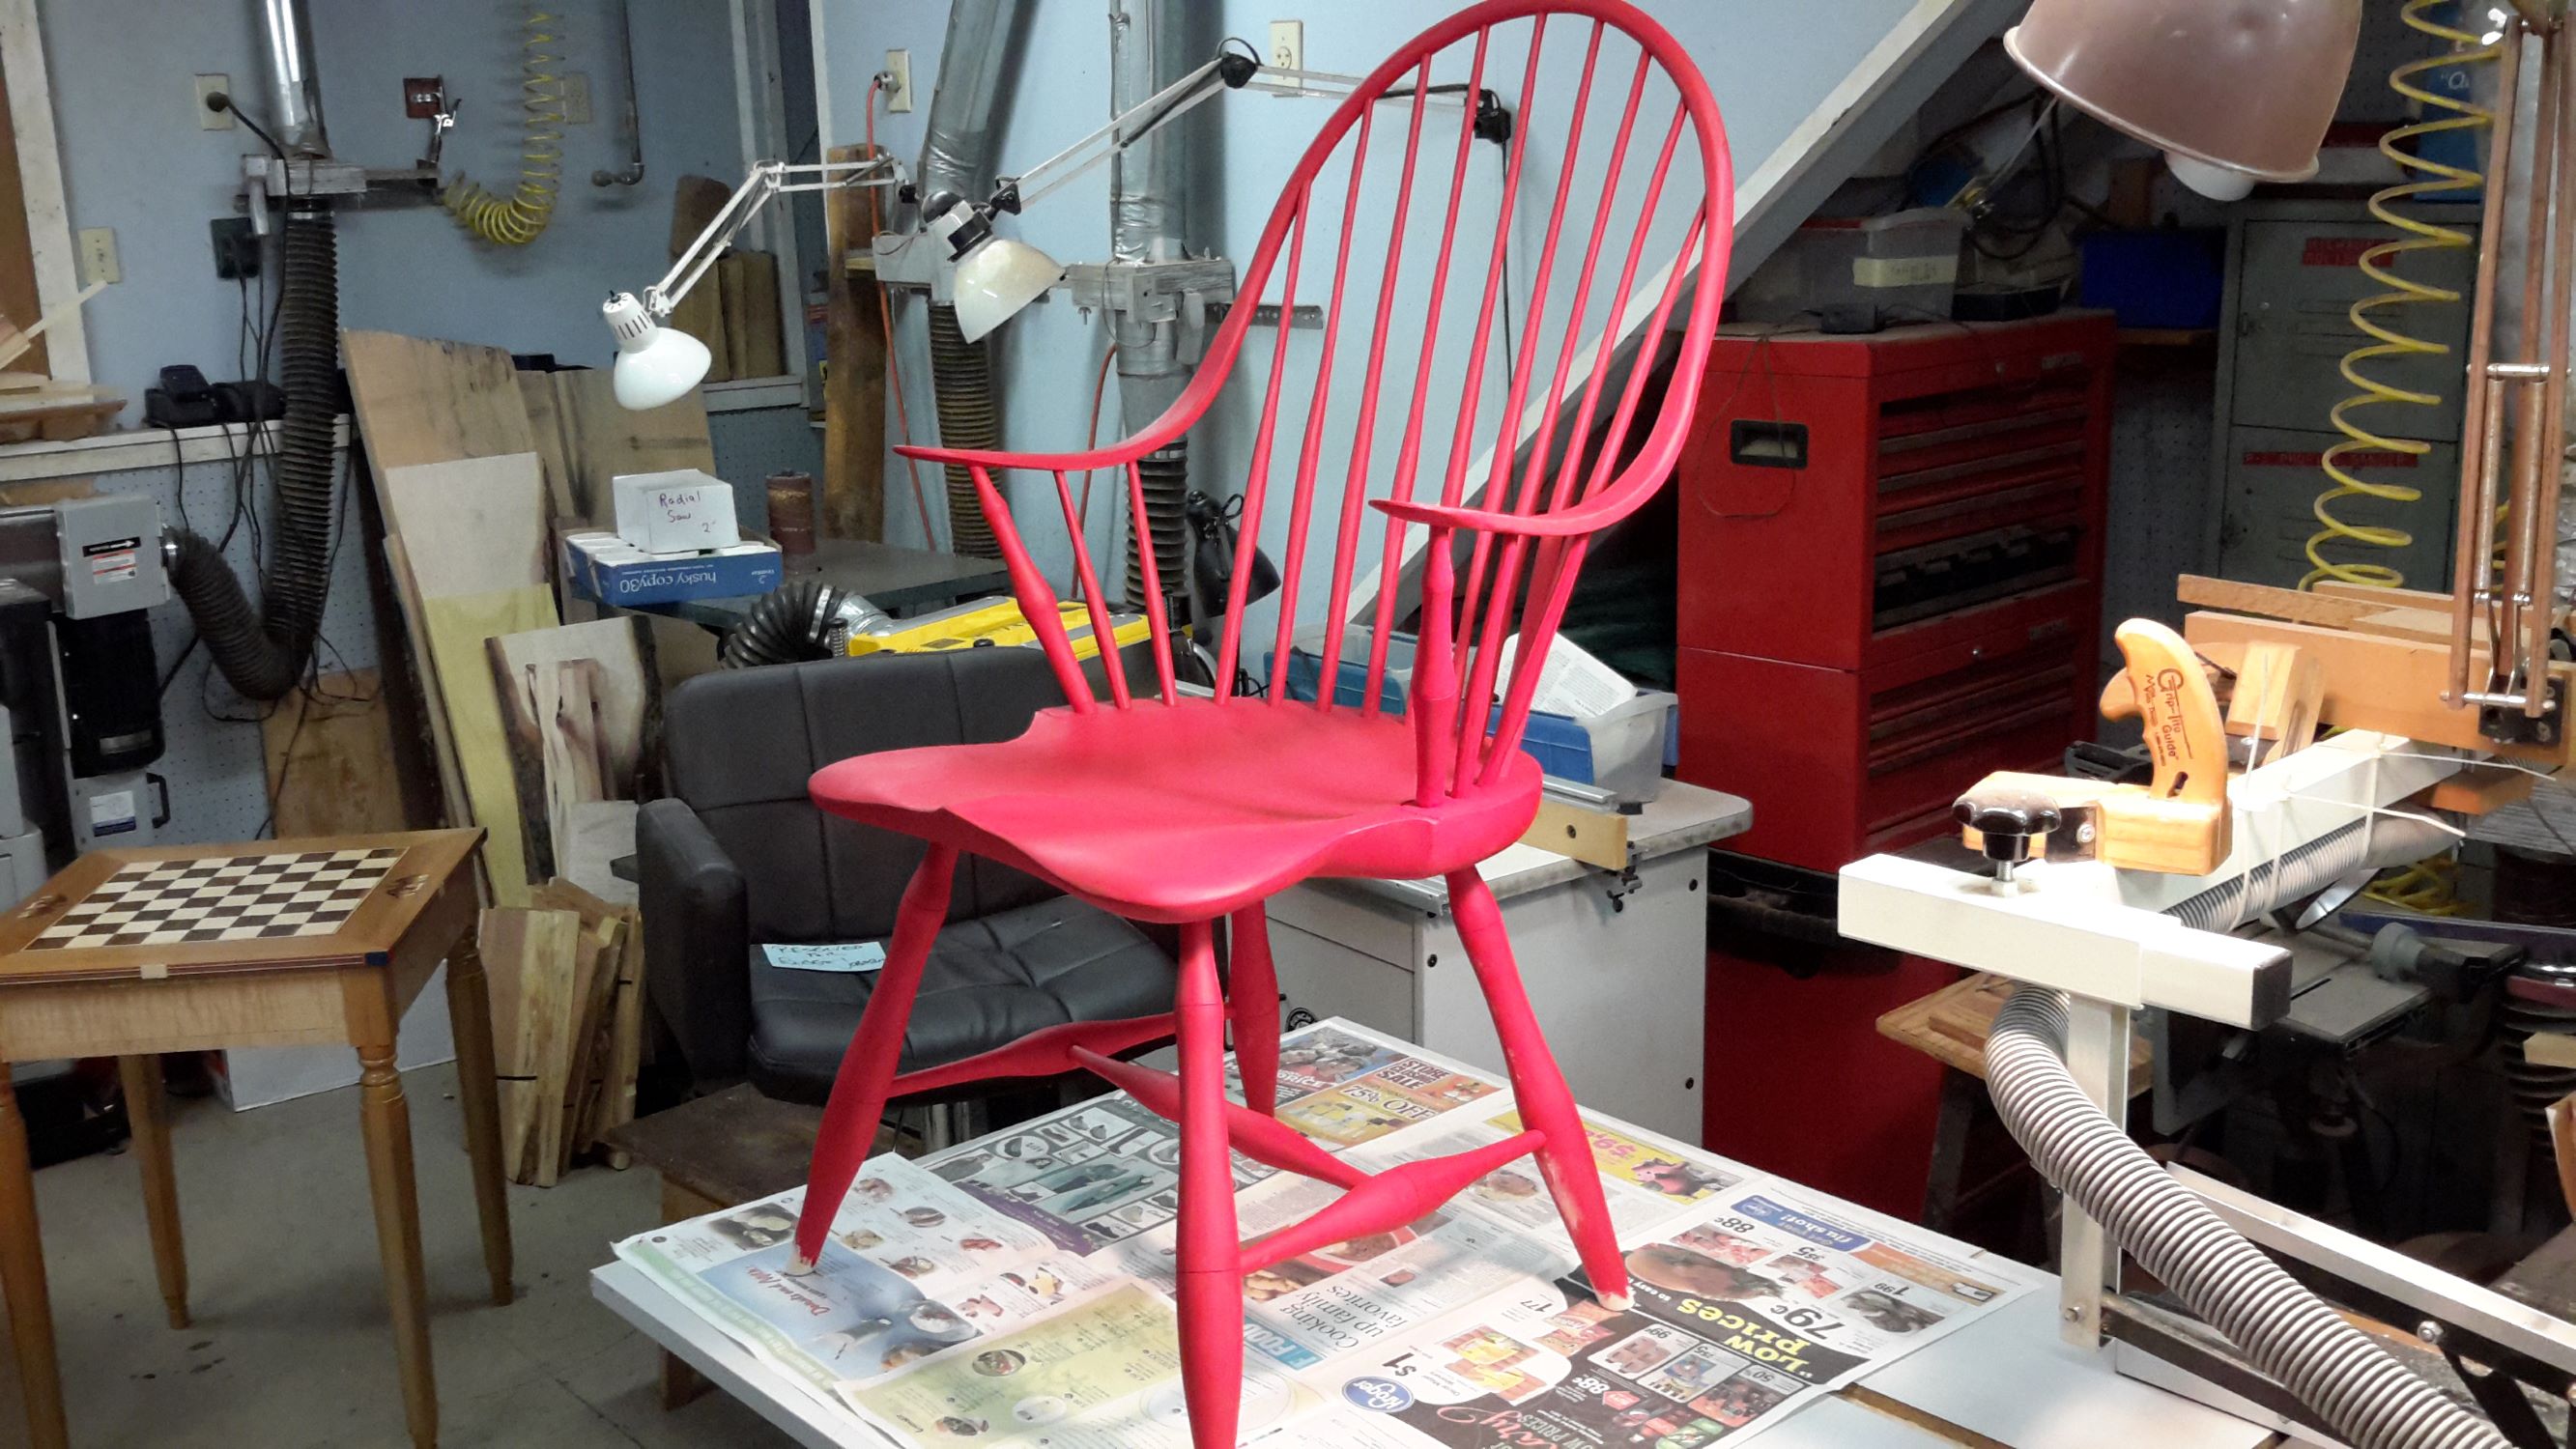
Windsor chair with Holiday Red paint
What I really like about the General Finishes milk paint is that the grain of the wood can still be clearly seen through the paint. With more coats, this will build up to where the grain is not shown, but I like the flexibility of being able to use the milk paints as almost a wash. General Finishes recommends at least two coats, and you can still see the grain if you are not heavy handed with the amount of paint.
Traditionally the Windsor chairs were painted, in order to show a consistent finish. The chairs are usually made from white oak (chair arms and back spindles), sugar or white pine (chair seat) and/or maple (legs and arm supports). A finish on all three of those woods would look very different, so the typical finish is a paint, in order to cover up the differences in the woods used to make the chair.
A close up of the Windsor chair seat with the General Finishes Holiday Red milk paint-
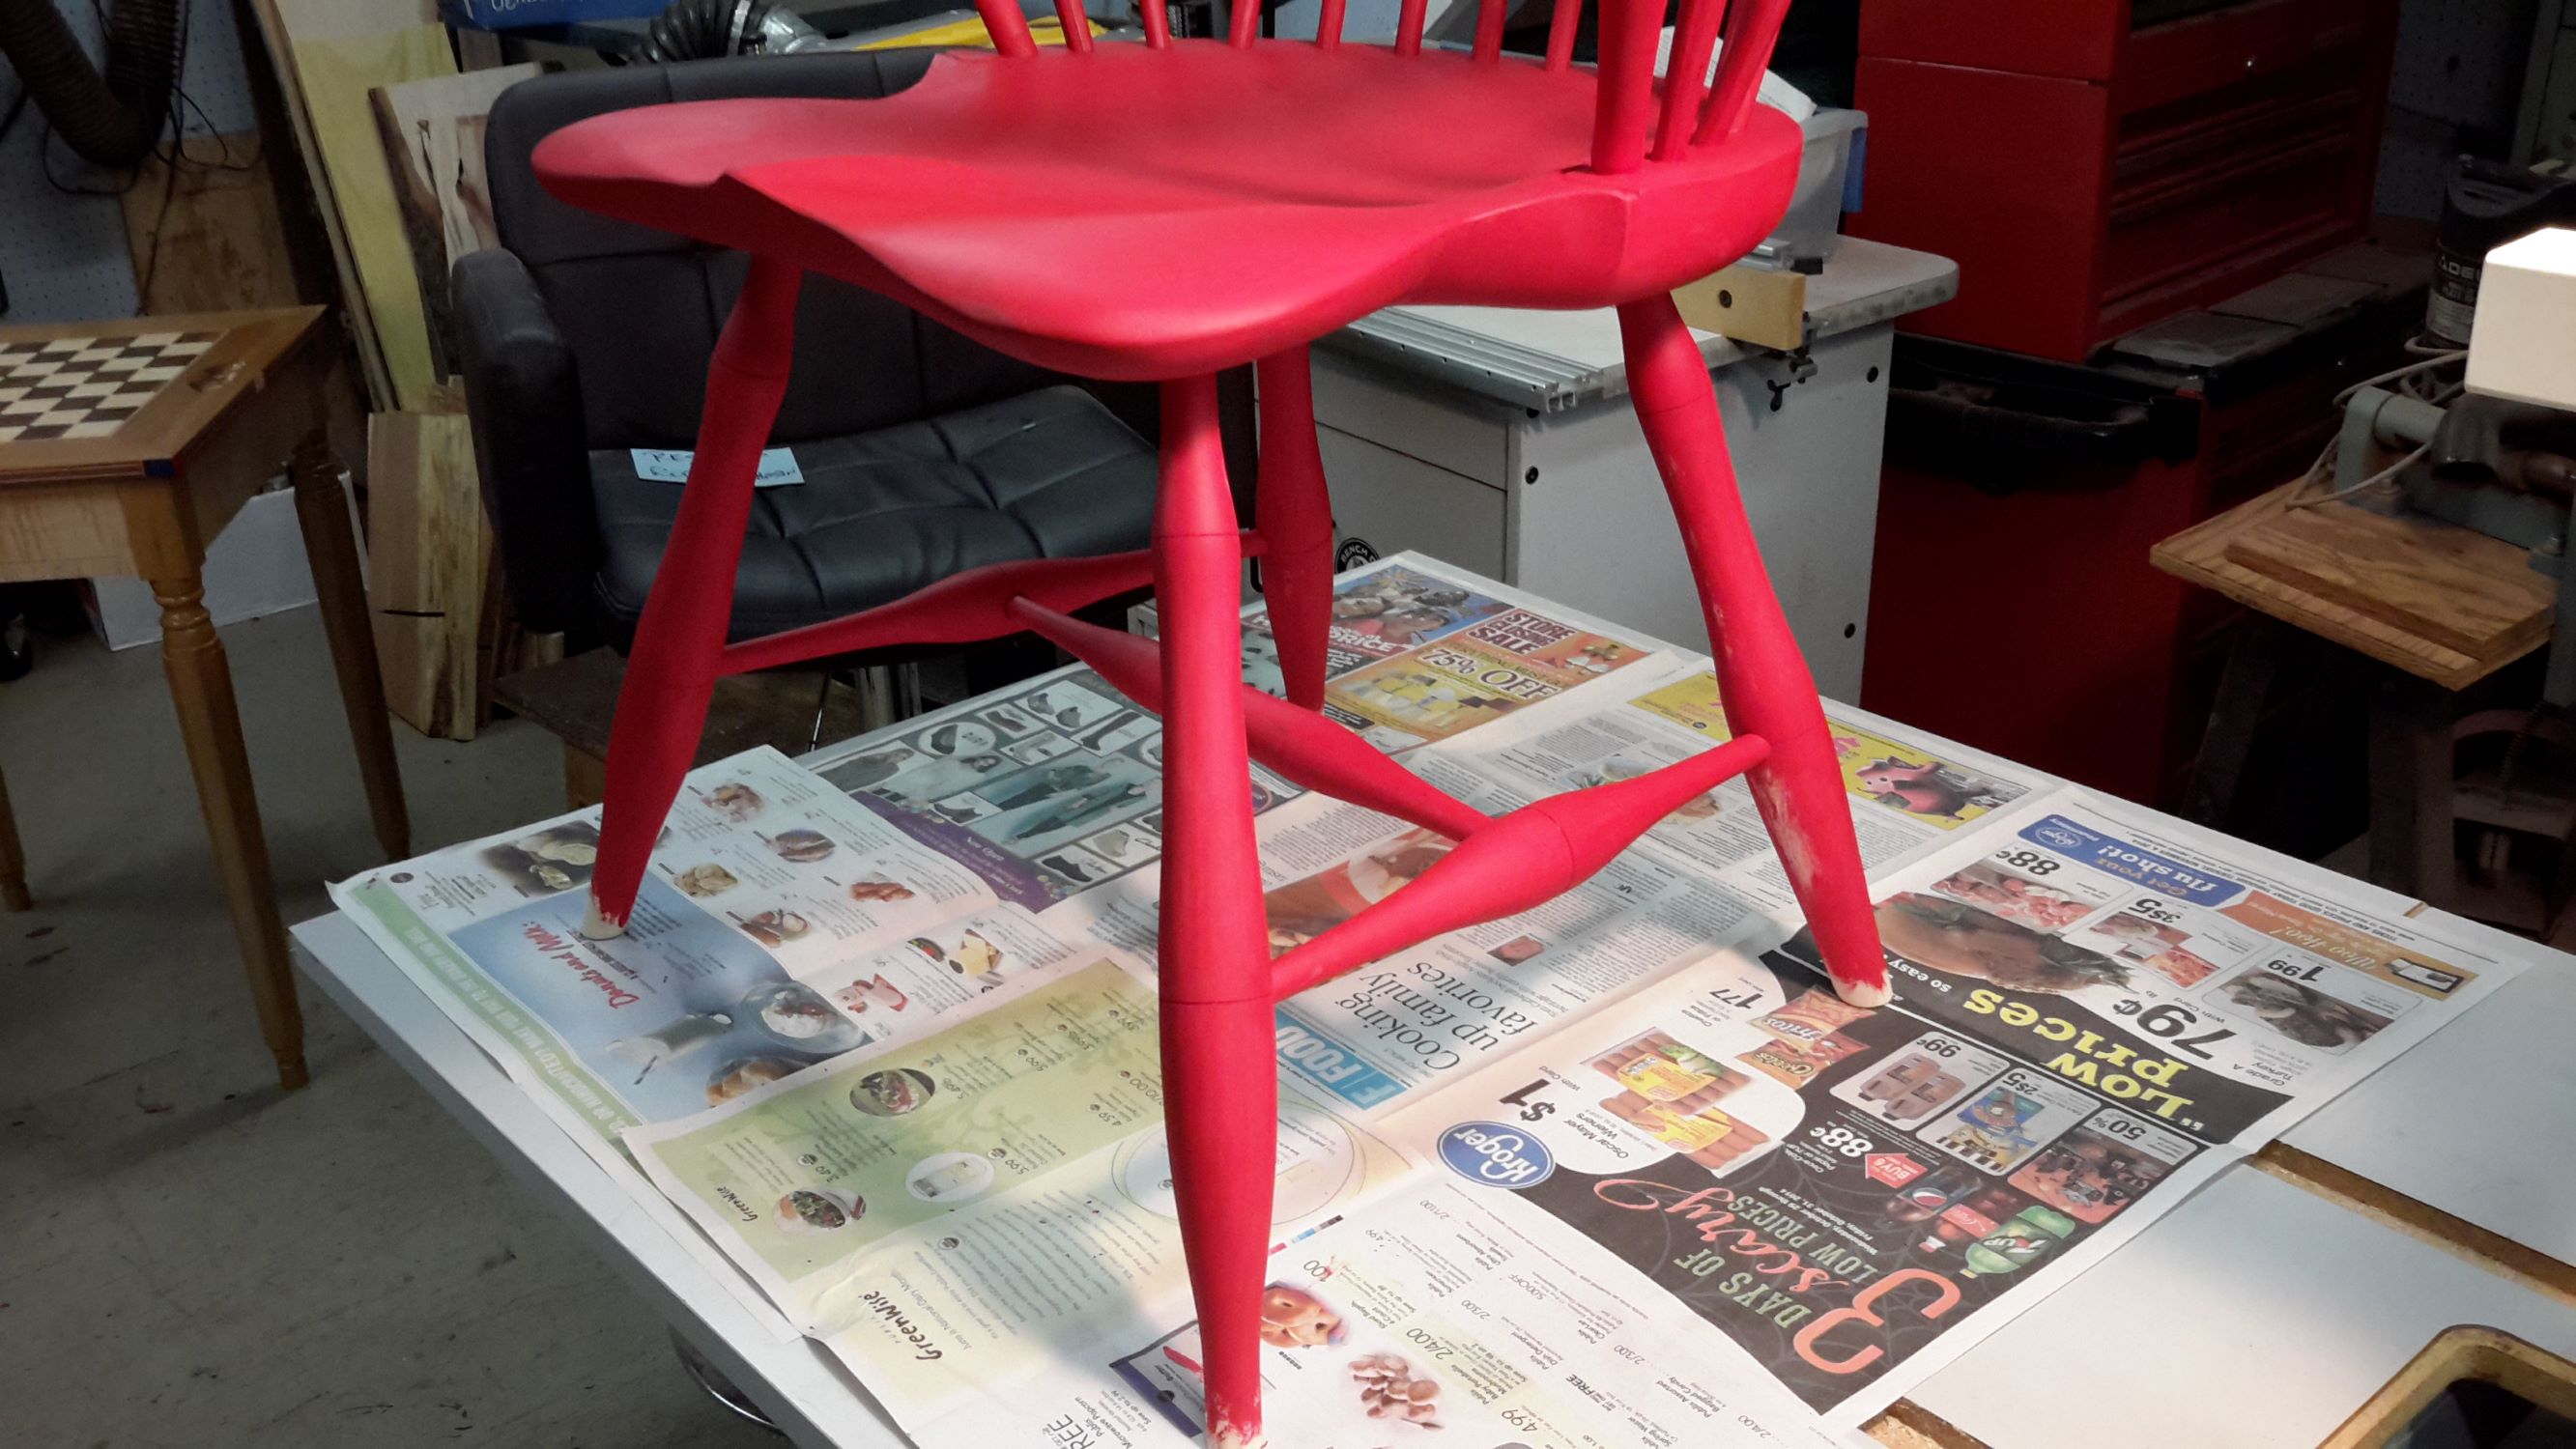
Windsor chair seat close up
The next step was to lightly sand the first coat of paint, blow off all the dust, and then add the General Finishes Lamp Black milk paint coat.
The first coat of Lamp Black was not heavy enough to cover over the Holiday Red color. I really liked the effect that the paint left, but it was not exactly what I was looking for.
First coat of Lamp Black paint-
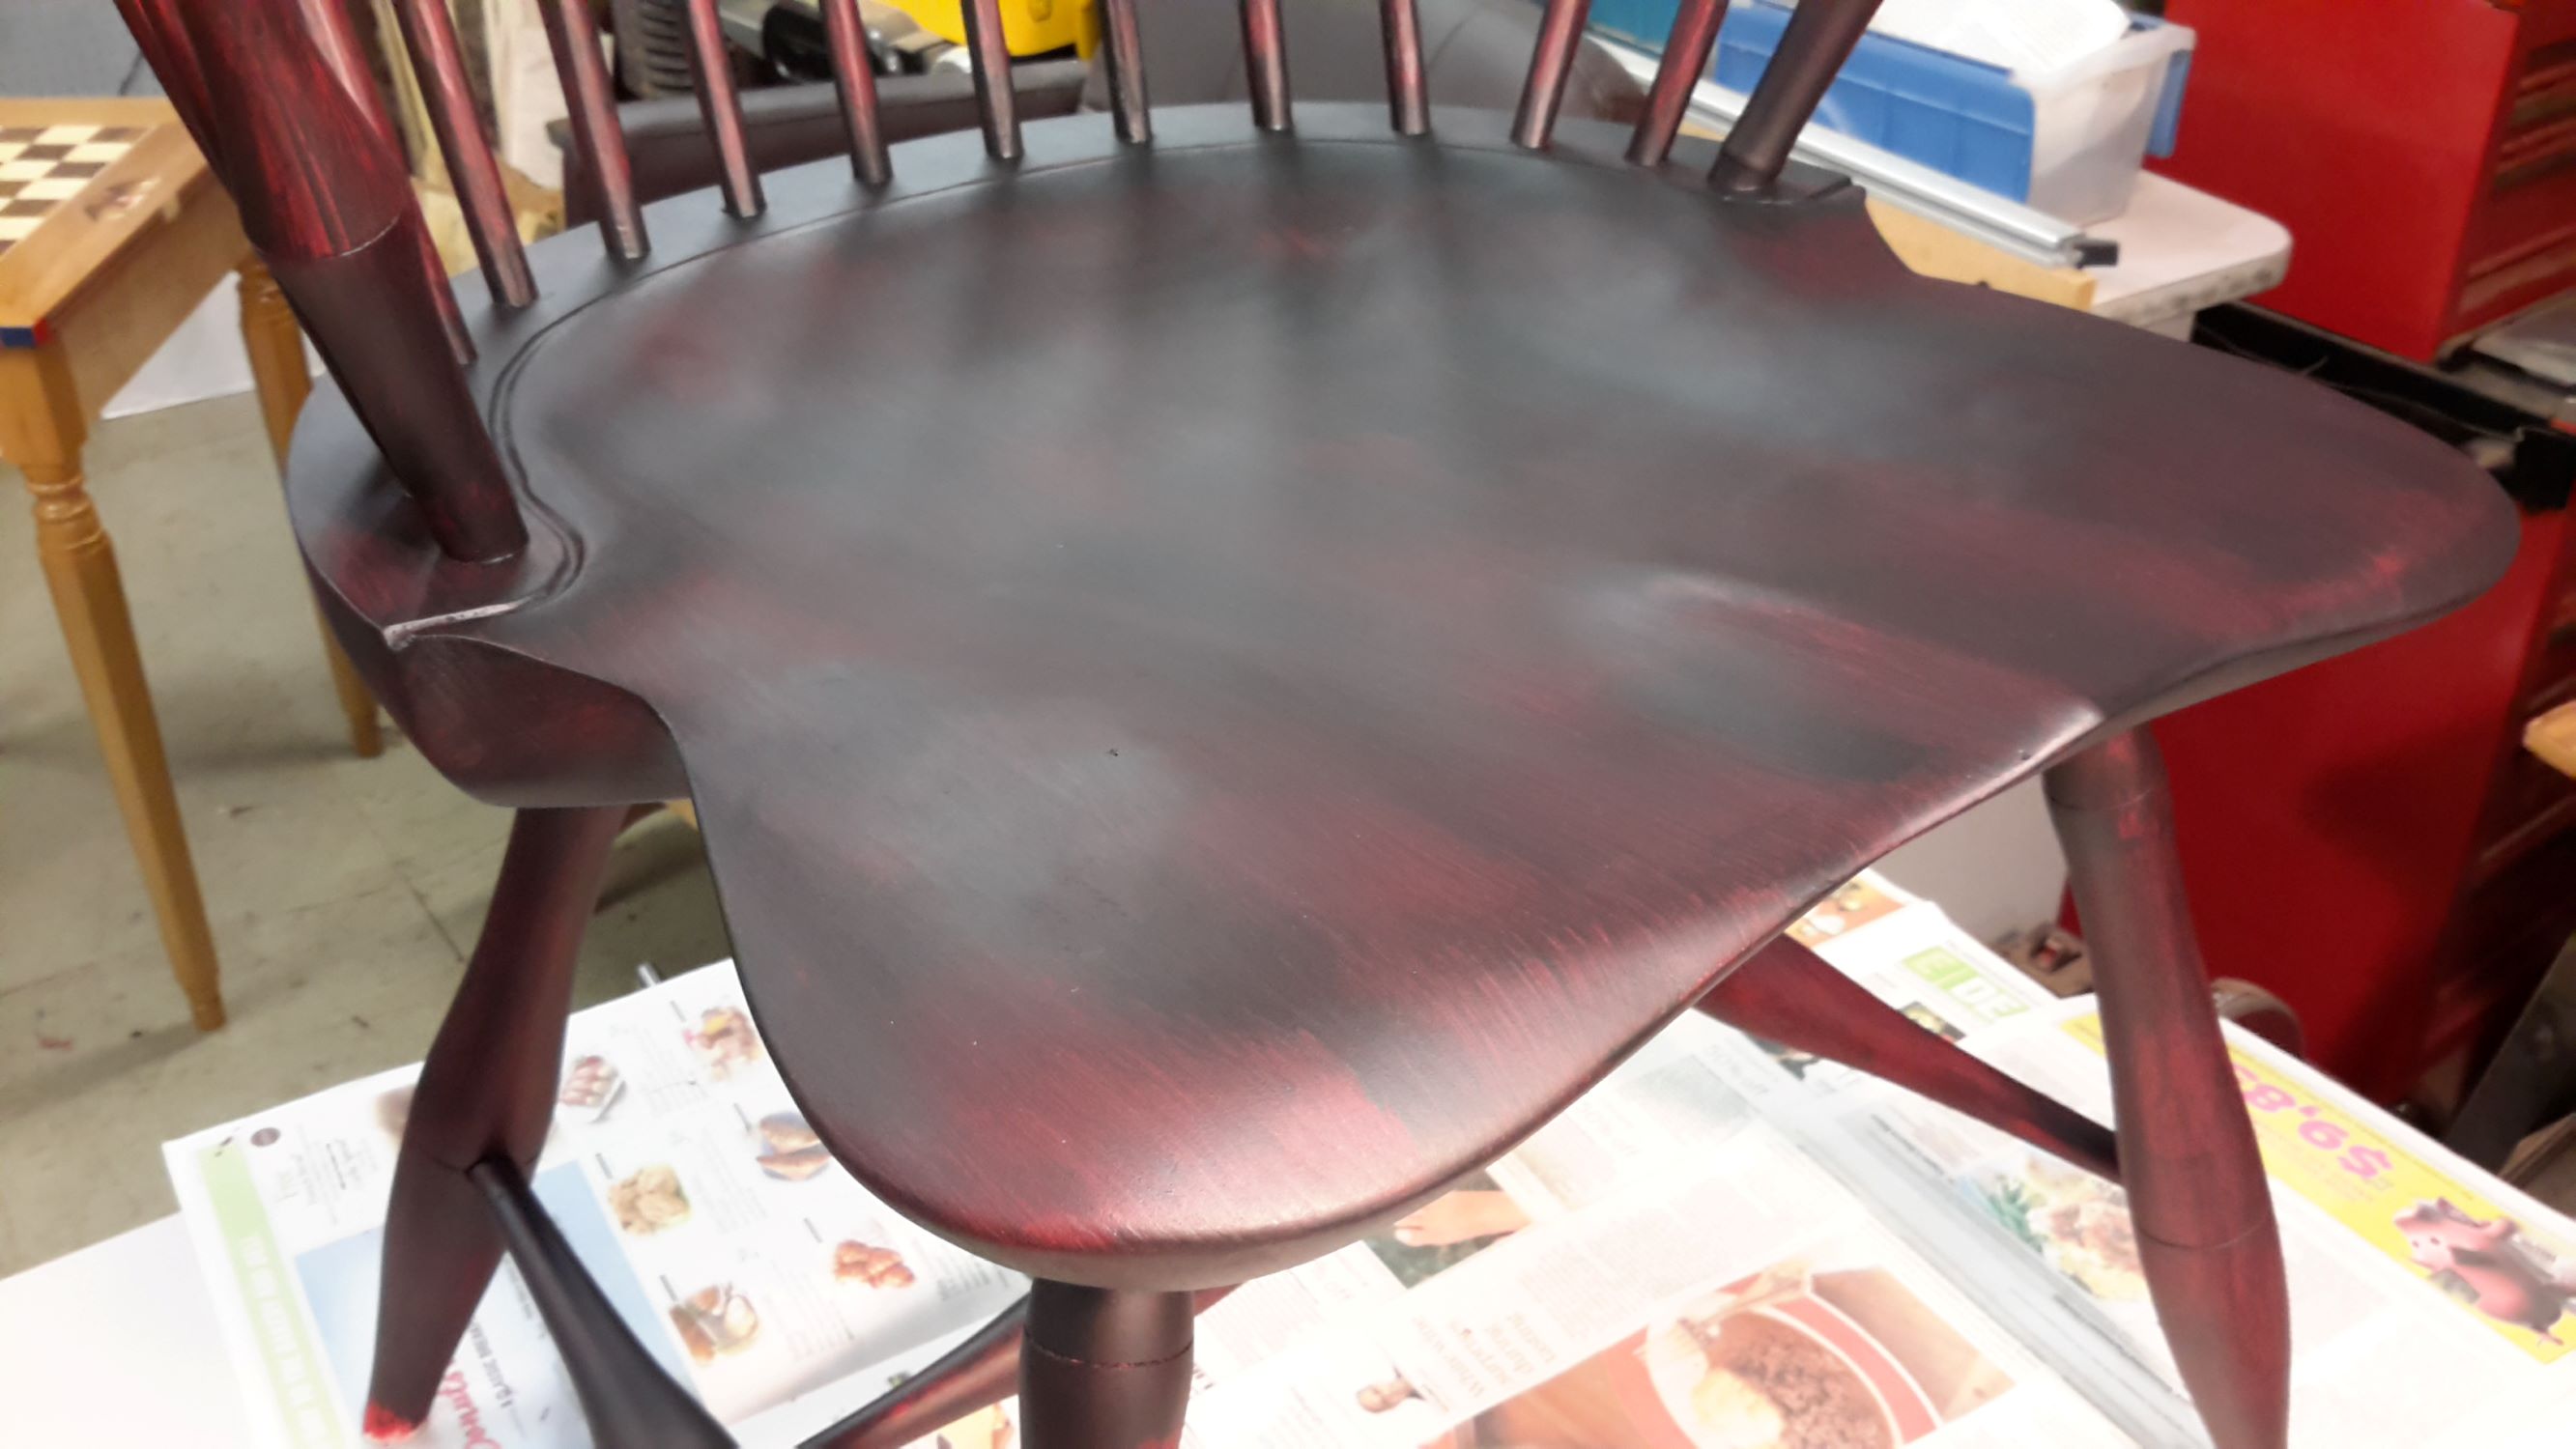
Windsor chair first coat of General Finishes Lamp Black
I will sand this coat when it has dried, and apply a second coat of the General Finishes Lamp Black milk paint. Once the second coat of paint is dried, I will start to sand off the finish. Yeah, you read that correctly. I spent a ton of time getting this chair to look brand new, and now I am going to make it look like it needs to be repainted! Go figure!
Stay tuned, I will post more about the home stretch for the Windsor chair as soon as I can!
